Barbers Blog Index

How to straight razor shave

This is a photo tutorial for a beginner Straight-Razor shave, it will teach you how to shave “with the grain” only. Some may criticize my technique or grip, but I have been shaving this way for several years and these are the strokes that work best for me. There is no right or wrong way as long as the shave is smooth and comfortable for you. I hope you find these steps helpful, happy shaving! 
Anthony Berriola

HOLDING THE RAZOR
I use two different grips when I shave: FREE HAND and BACK HAND. You may find other grips that are recommended by fellow Wet Shavers or websites, it is all preference but these are the ones that are comfortable for me.

FREE HAND

FREE HAND

BACK HAND

BACK HAND

LET THE SHAVE BEGIN (notice how I use my empty hand to “stretch” or “flatten” the skin)

STEP 1 - Free Hand

STEP 1 - Free Hand

STEP 2 - Free Hand

STEP 2 - Free Hand

STEP 3 - Free Hand

STEP 3 - Free Hand

STEP 4 - Back Hand

STEP 4 - Back Hand

STEP 5 - Free Hand

STEP 5 - Free Hand

STEP 6 - Free Hand

STEP 6 - Free Hand

STEP 7 - Back Hand

STEP 7 - Back Hand

Step 8 - Free Hand

Step 8 - Free Hand

STEP 9 - Free Hand

STEP 9 - Free Hand

STEP 10 - Free Hand

STEP 10 - Free Hand

STEP 11 - Back Hand

STEP 11 - Back Hand

STEP 12 - Free Hand

STEP 12 - Free Hand

STEP 13 - Free Hand

STEP 13 - Free Hand

Safety Razor vs. Cartridge Razor: Shave like a grownup!

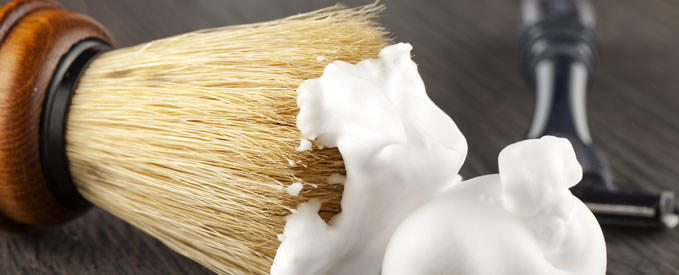
Have you been looking to get a better shave but not ready to take on a straight-razor? Maybe you should try out a Safety Razor.  This post is not actually a debate, and if it were, the Safety Razor would win hands-down each time.  This post is more of an attempt to educate and convince you as to why you should throw out that 3 or 4 Blade razor and start shaving like a Grown-up.

Safety razors (also called Double-Edge Razors or DE Razors) have been around for a long time, and for decades they were the most popular method of shaving.  King Camp Gillette (sound familiar?) learned that the path to fortune was to invent a product that was not intended to be re-used, but instead used once and thrown out, assuring a constant flow of repeat sales.  Thanks to the expensive marketing ploys put on by companies like Gillette, Safety Razors have been overshadowed in this world of “convenience.”  Don’t get brainwashed by these big marketing campaigns that tell you shaving with a 63 blade razor with a lubricated strip and a vibrating handle will give you the closest shave.  Here lies the truth…
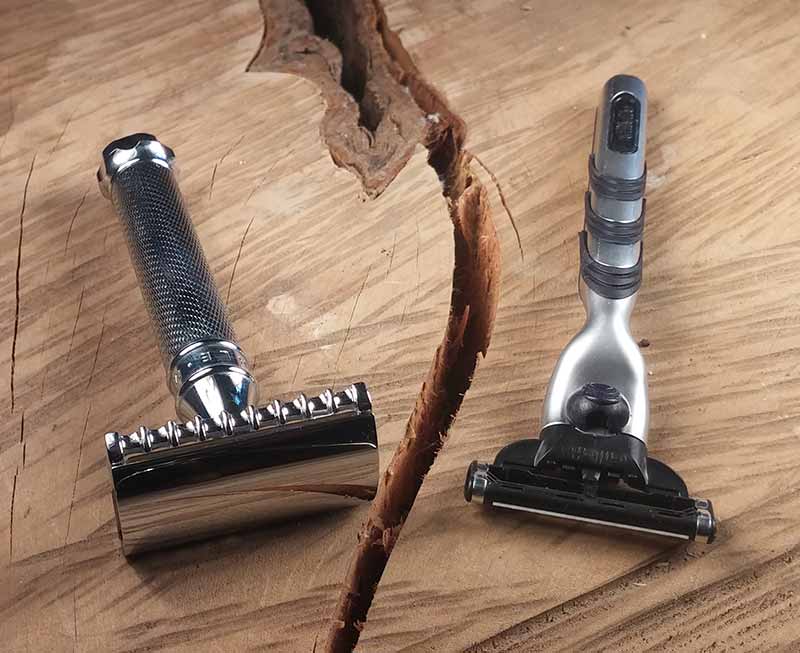
- CARTRIDGE RAZORS

These handles are generally plastic and have no weight to them, forcing you to apply excessive pressure during the shave. Its multiple blades are spaced extremely close together, causing pulling and tugging at longer stubble, making it uncomfortable and difficult to get a clean, close shave in a single pass.  While the first blade is aimed at cutting the beard at the surface, the second, third, and sometimes fourth blades drag behind the first one, removing layers of skin cells and cut the beard below the skin, causing irritation and dreaded ingrown hairs.  The spacing of the blades also makes it prone to clogging, which aids in bacteria growth which could lead to acne. They advertise a strip of lubricant that helps the razor glide over the skin, that stripusually wears away after the first shave making it basically non-existent. The only legitimate advantage of cartridge razors is its hinge/pivot point that moves the head of the razor with the contours of the face to maintain a constant angle while shaving. Lastly, I must admit that it is virtually impossible to cut yourself when using one one of these.

- SAFETY RAZORS

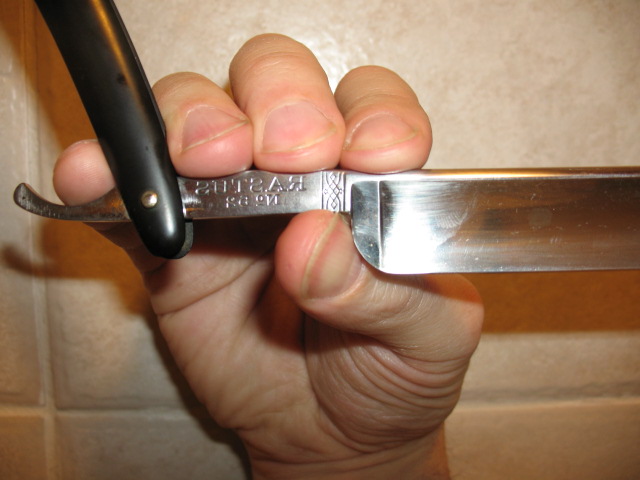
Aside from the fact that a safety razor will look pretty sweet when displayed in your bathroom, there are several benefits to using one. These razors have some heft to them and you can feel the difference in weight in your hand, this makes it easier to let razor do some of the work instead of putting too much pressure which could cause irritation and discomfort. The single blade is less prone to clogging, and will cut the beard at the skin level in a single pass, which helps avoid irritation and ingrown hairs.   The fact that safety razor blades are significantly cheaper than replacement cartridges, it makes it easier to replace the blade more often helping to avoid bacteria build up.  With a single pass, less ingrowns, less clogging and less bacteria, some claim that it has actually improved their complexion and reduced acne growth.  A high quality razor is made of a strong metal or stainless steel and will most likely have a lifespan that will outlast your own.  I have a razor from the 50’s, cleaned it up a bit and it works just as good as my new ones, see if your Mach 3 razor from a year ago can match that.

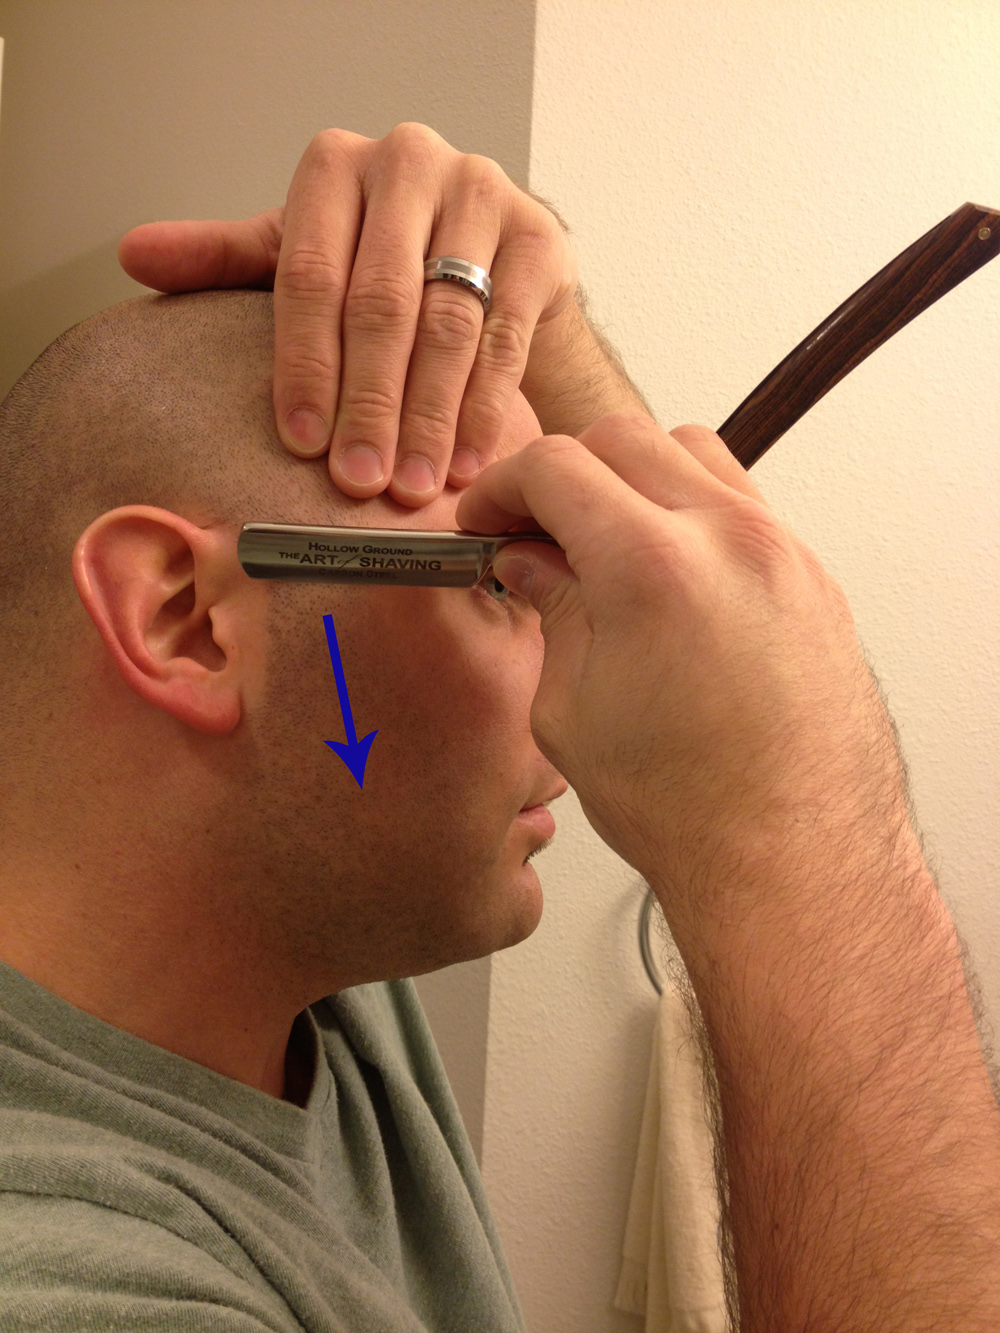
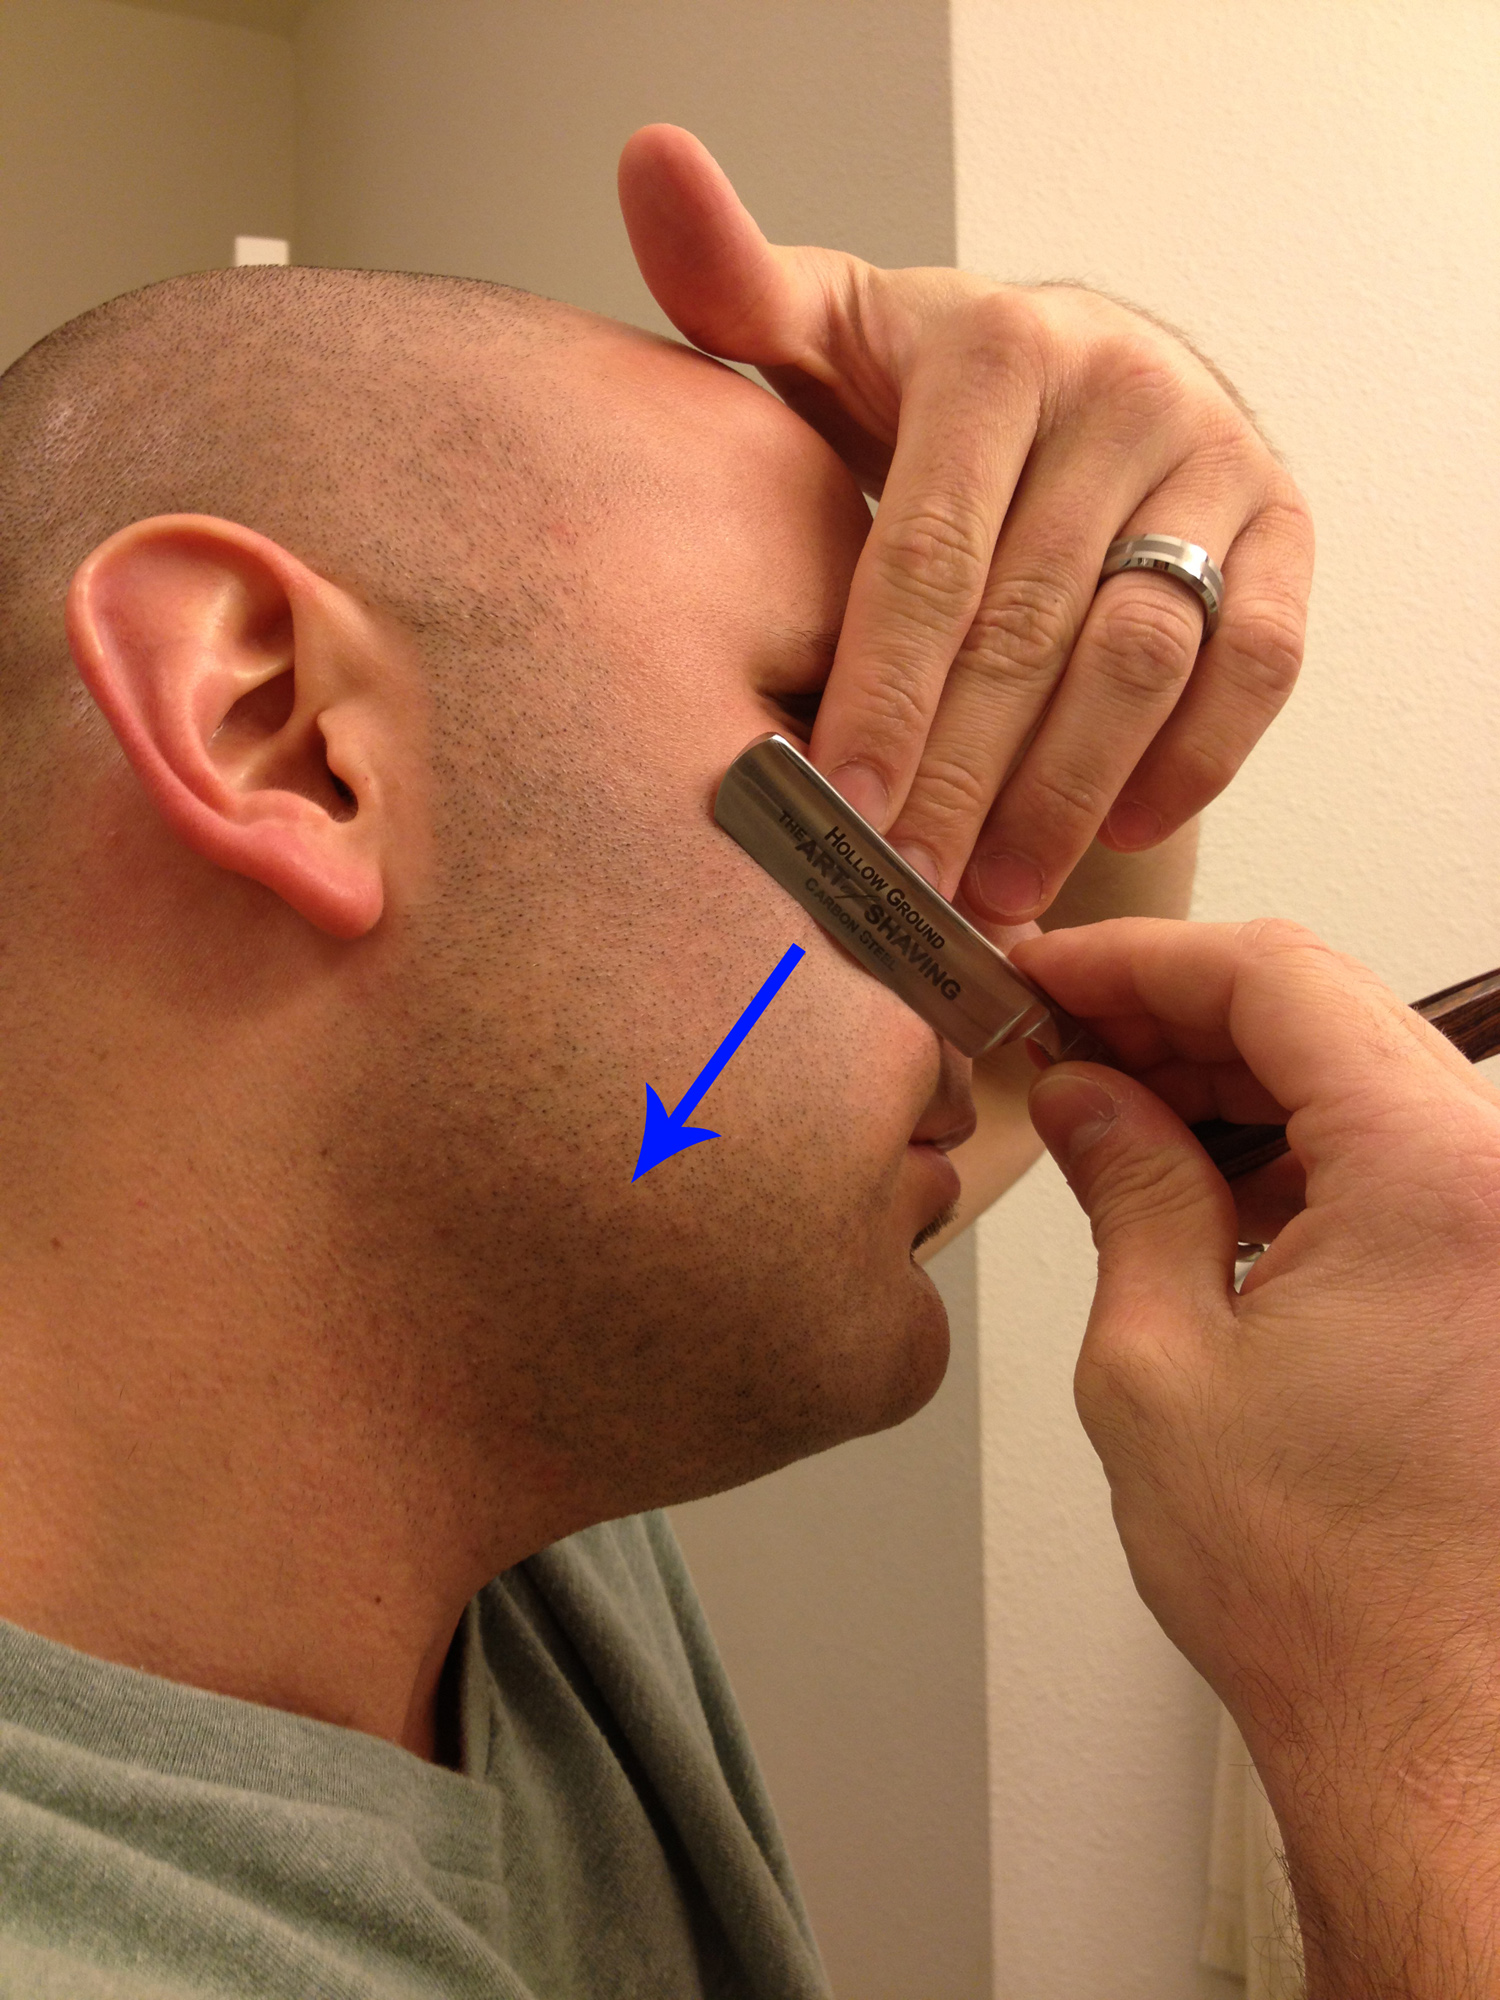
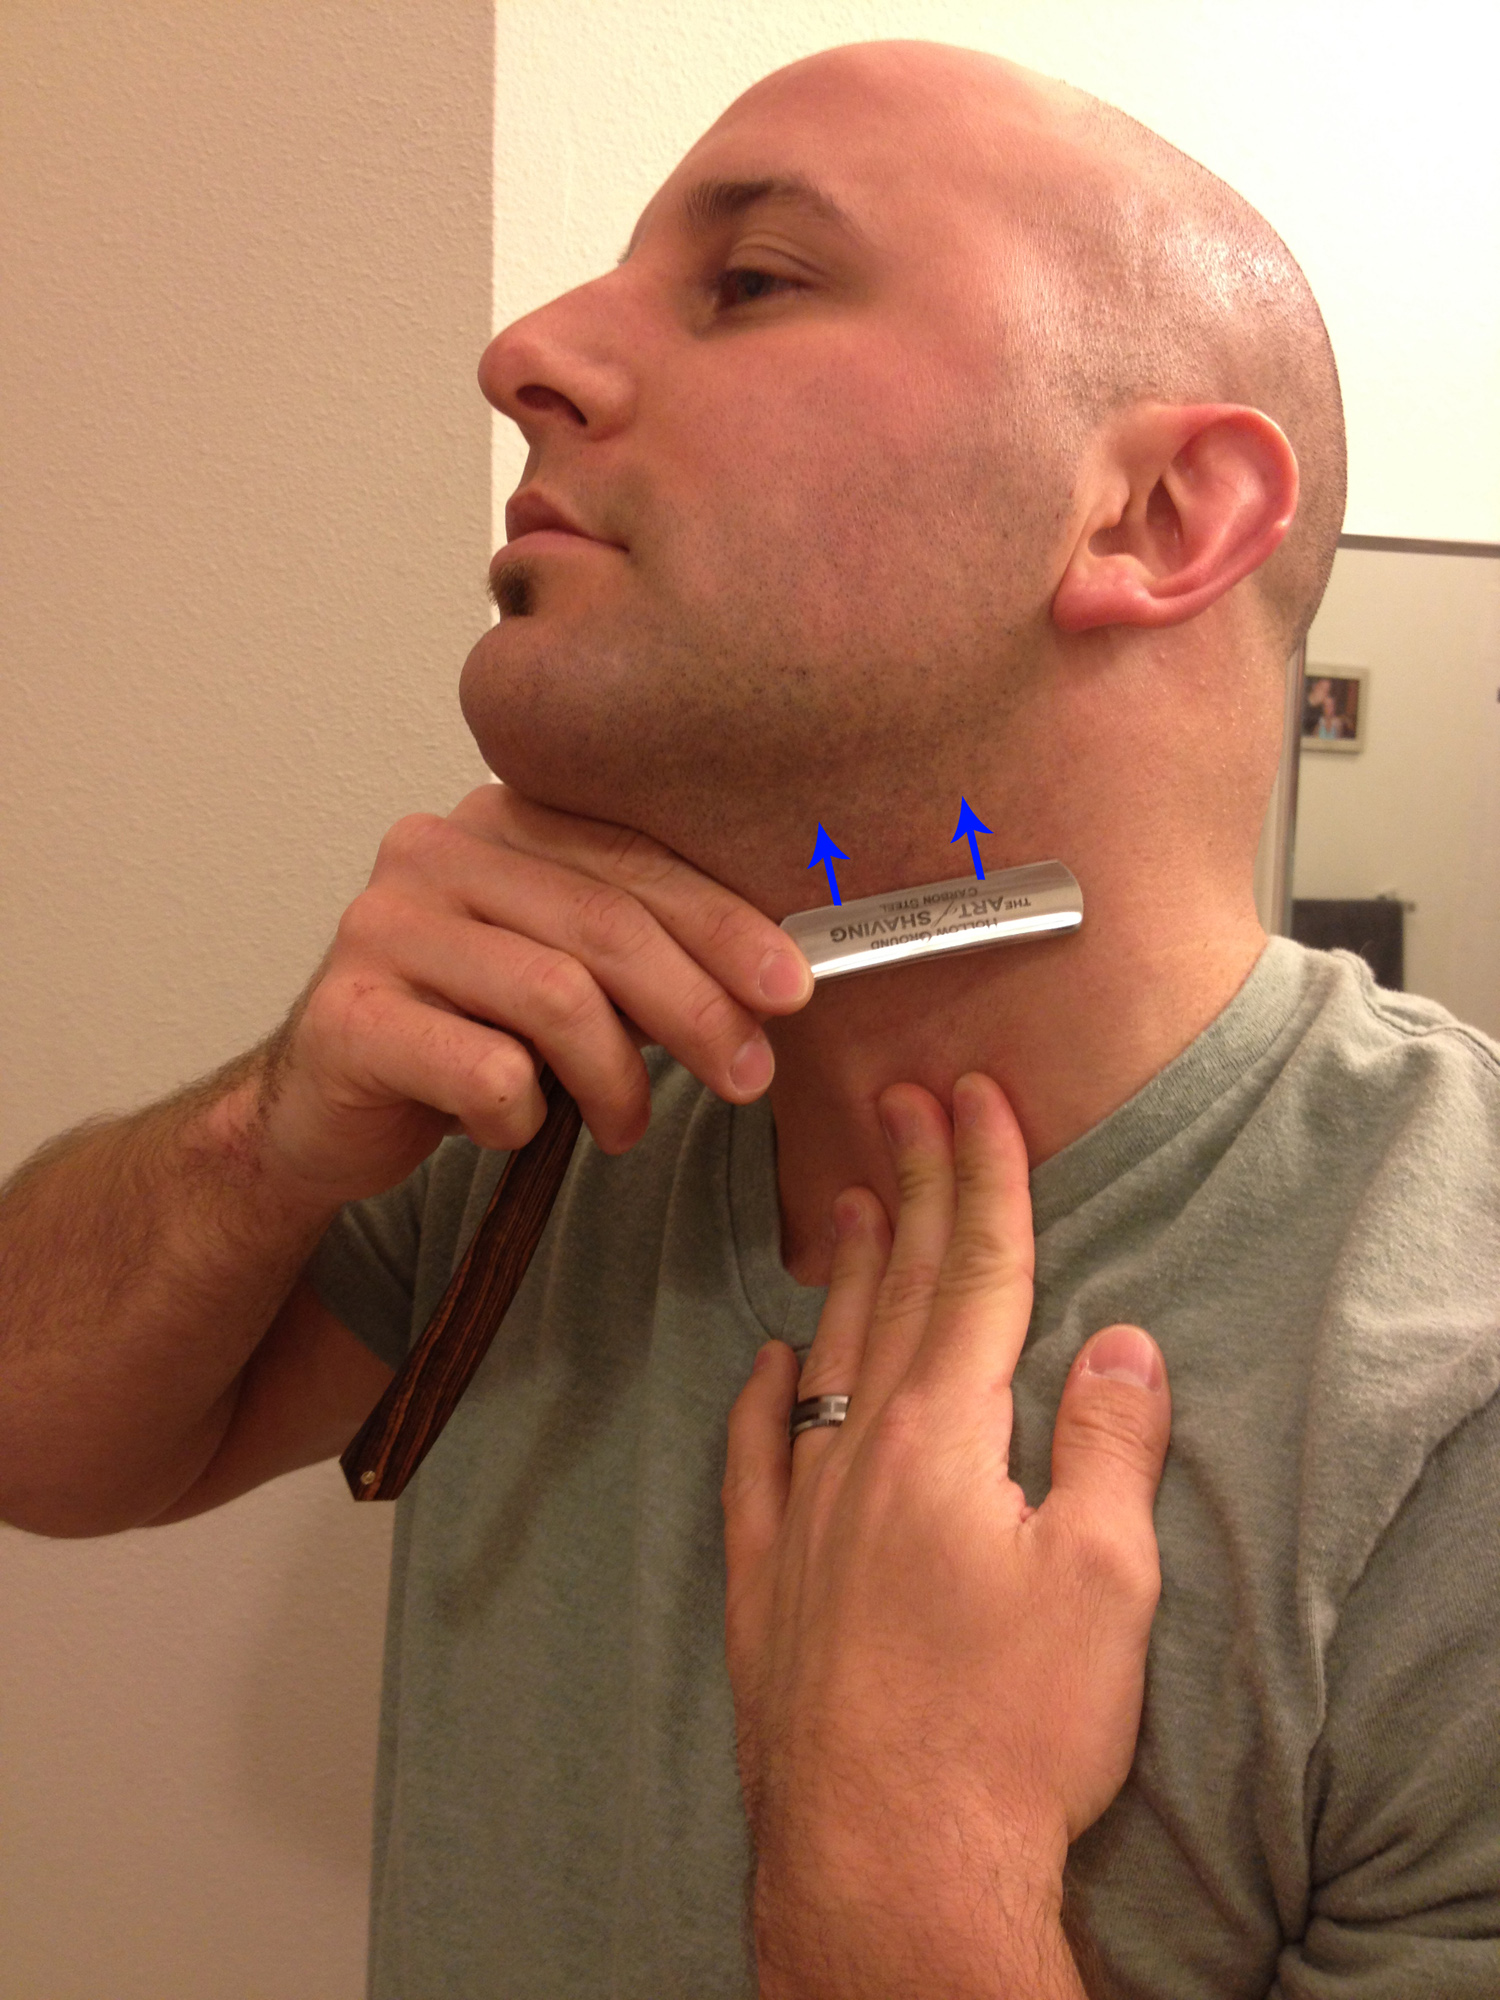
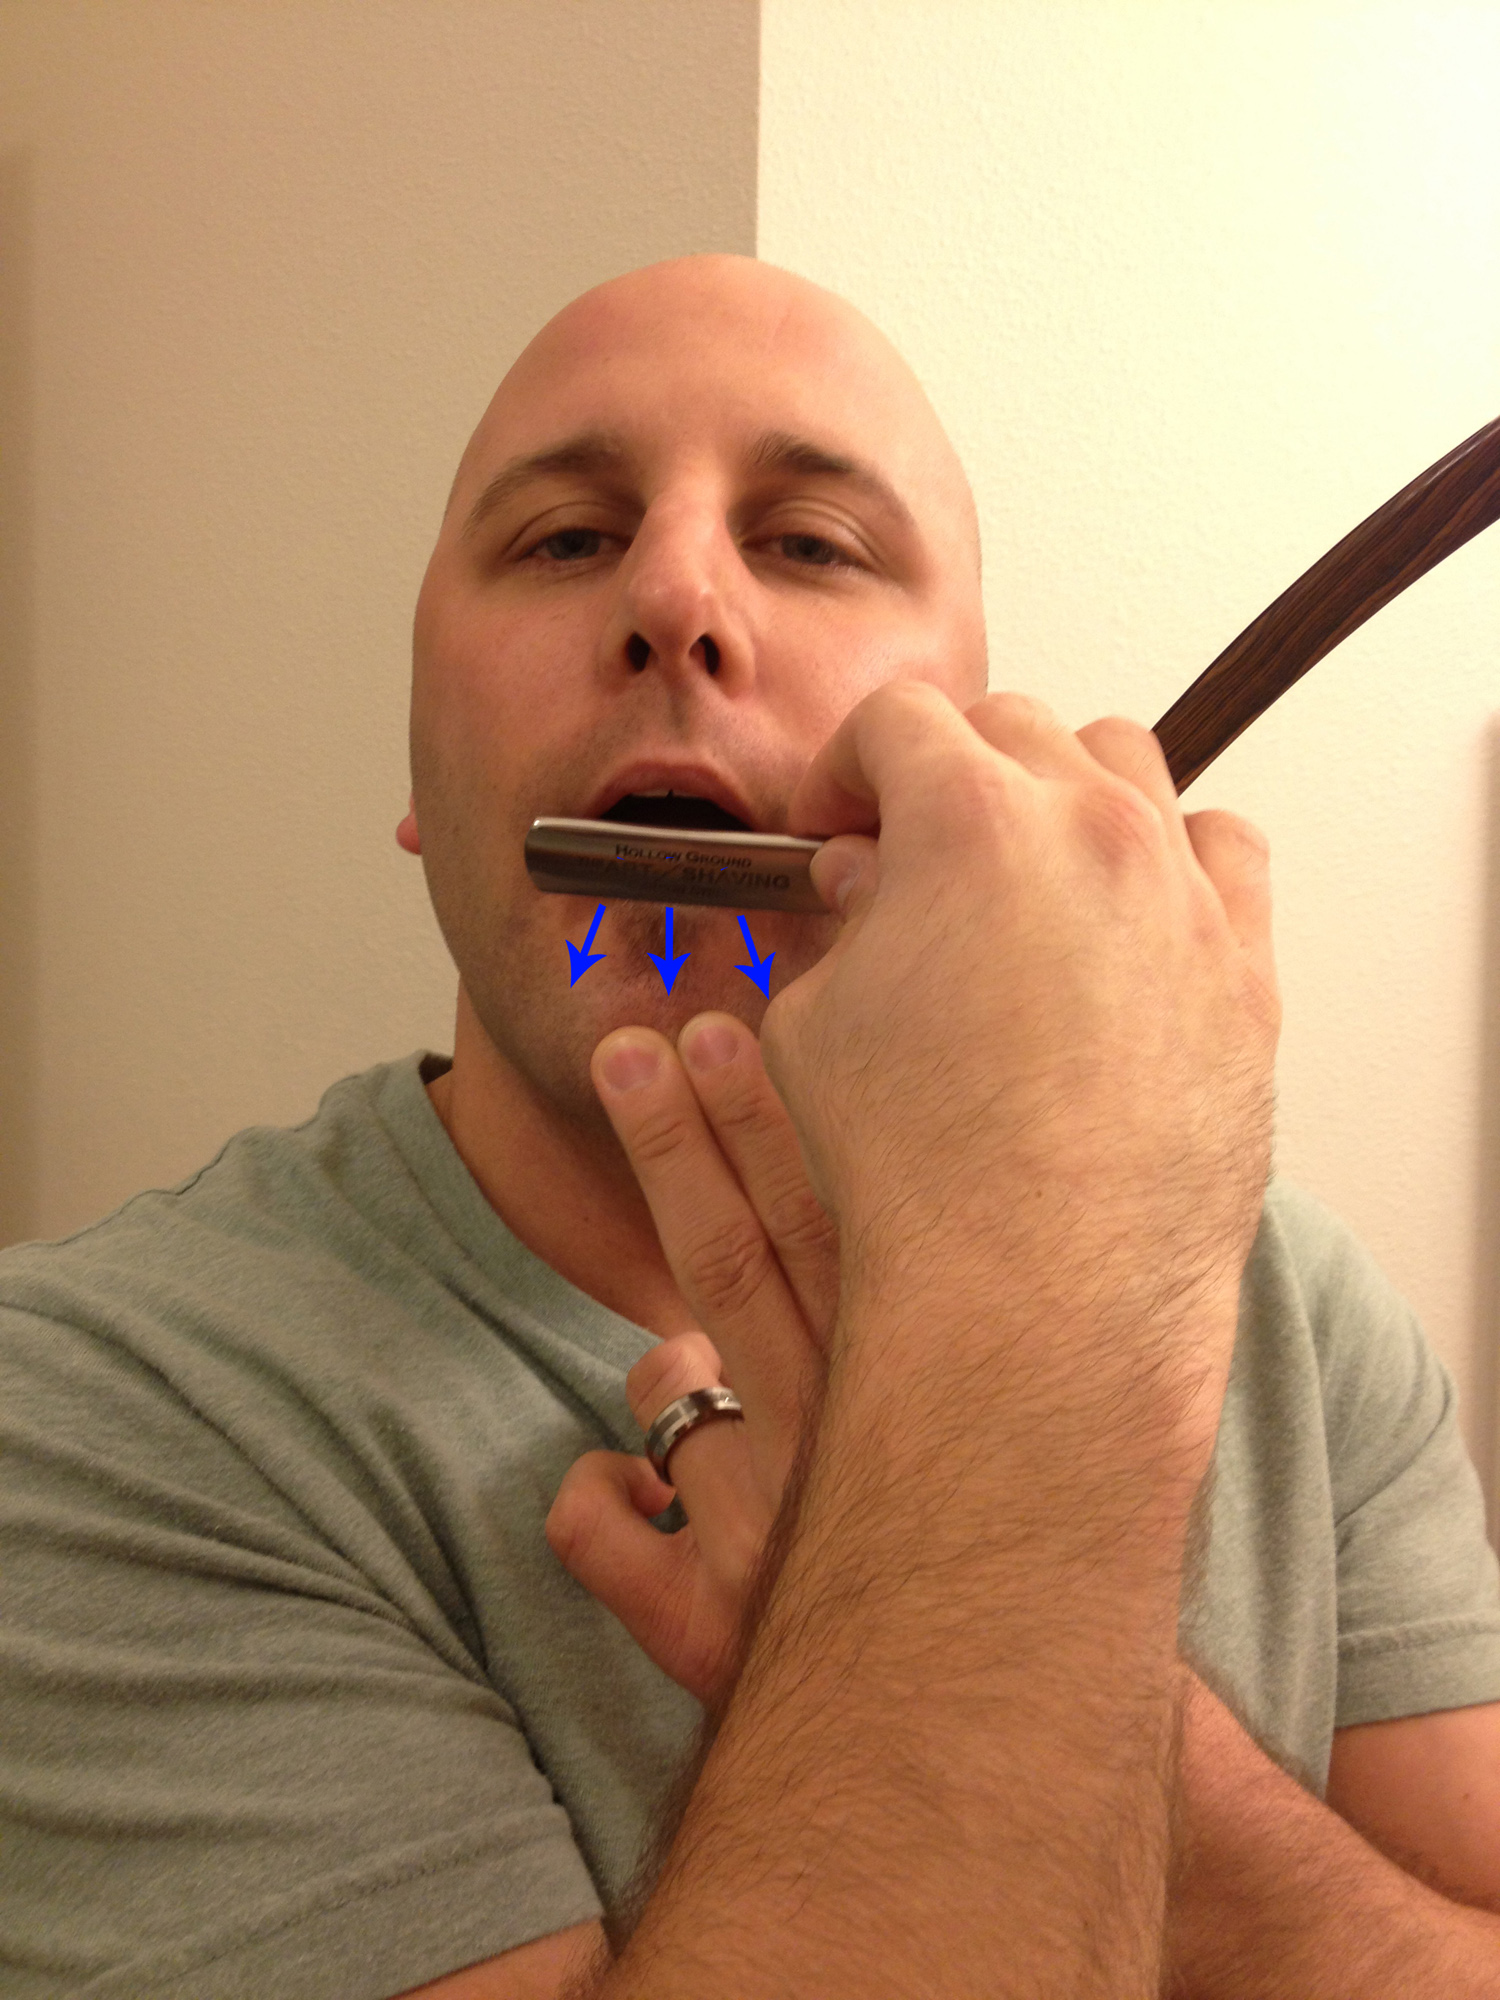
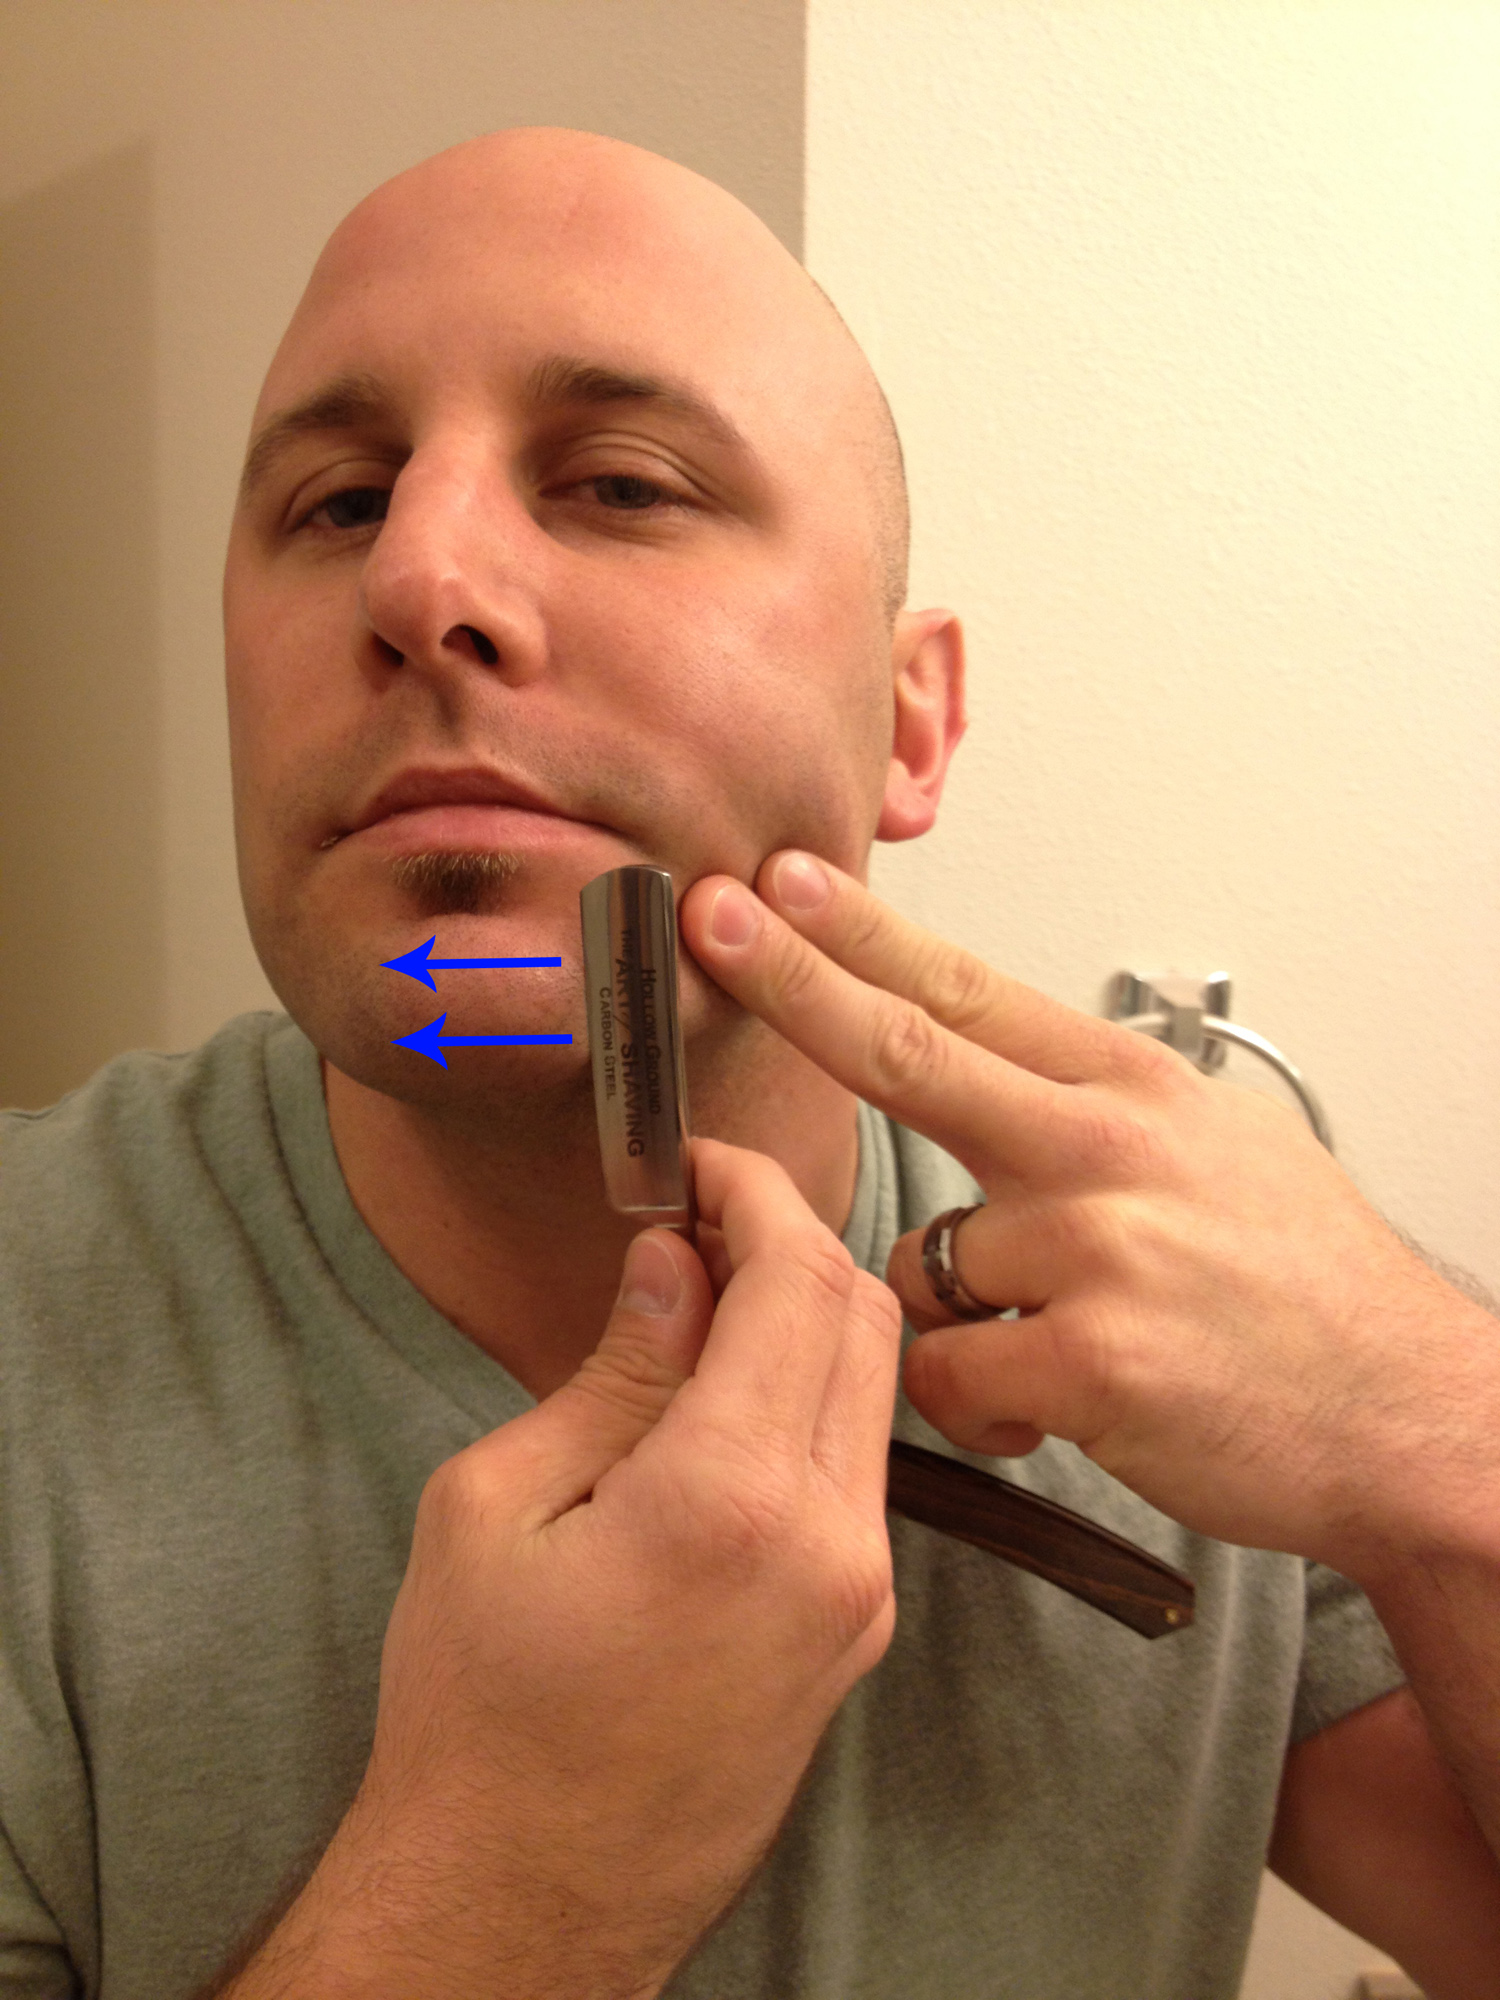
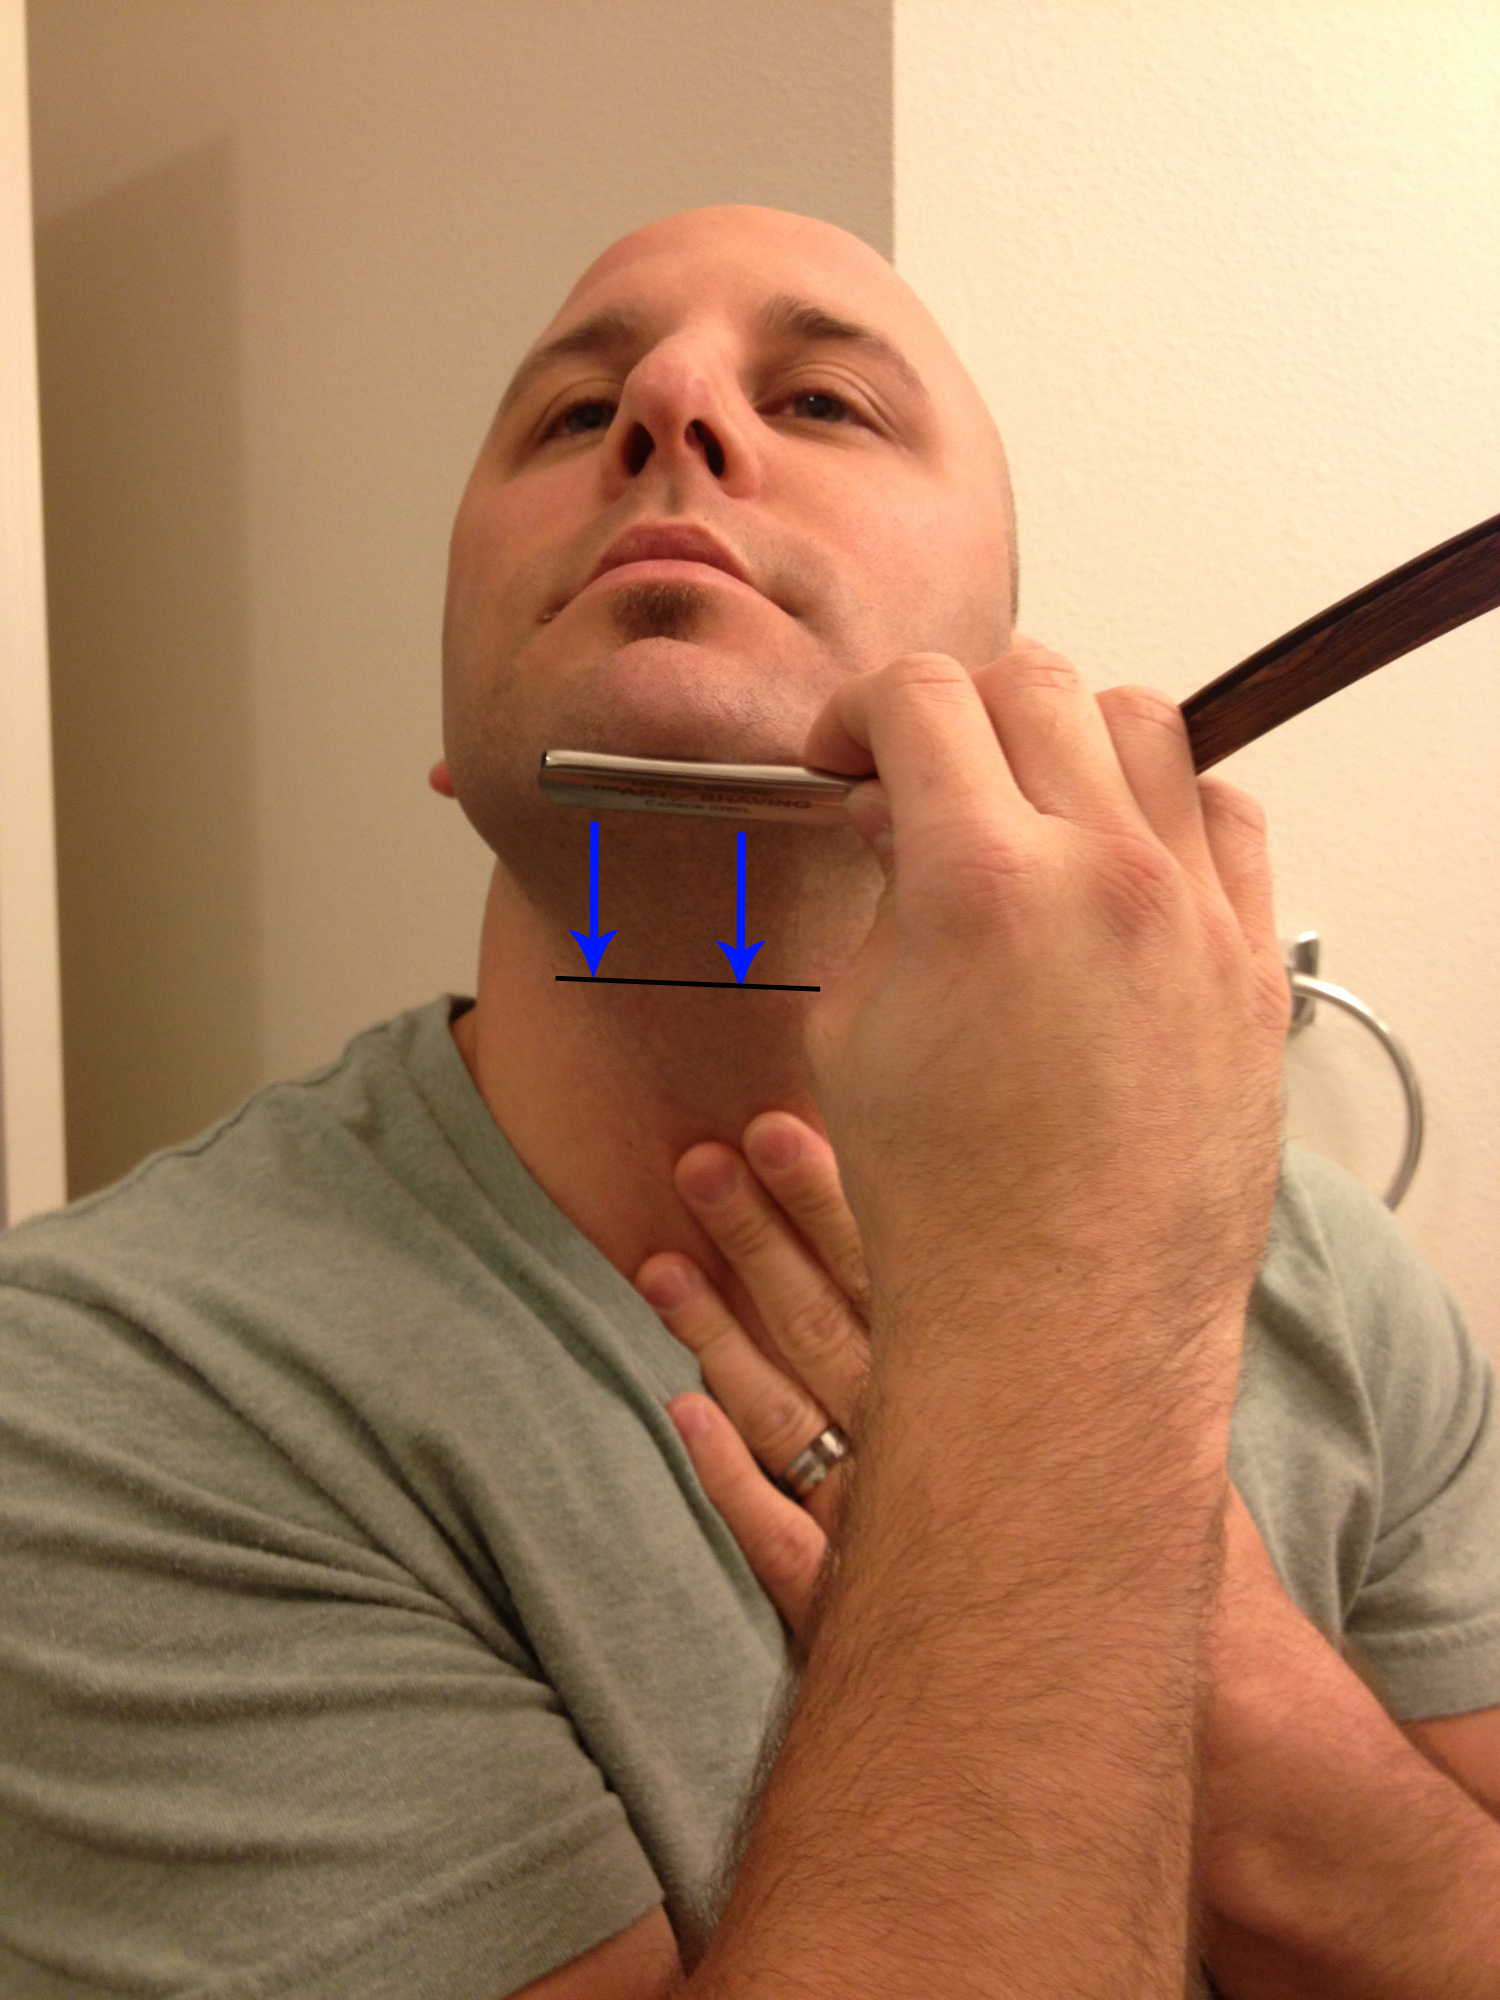
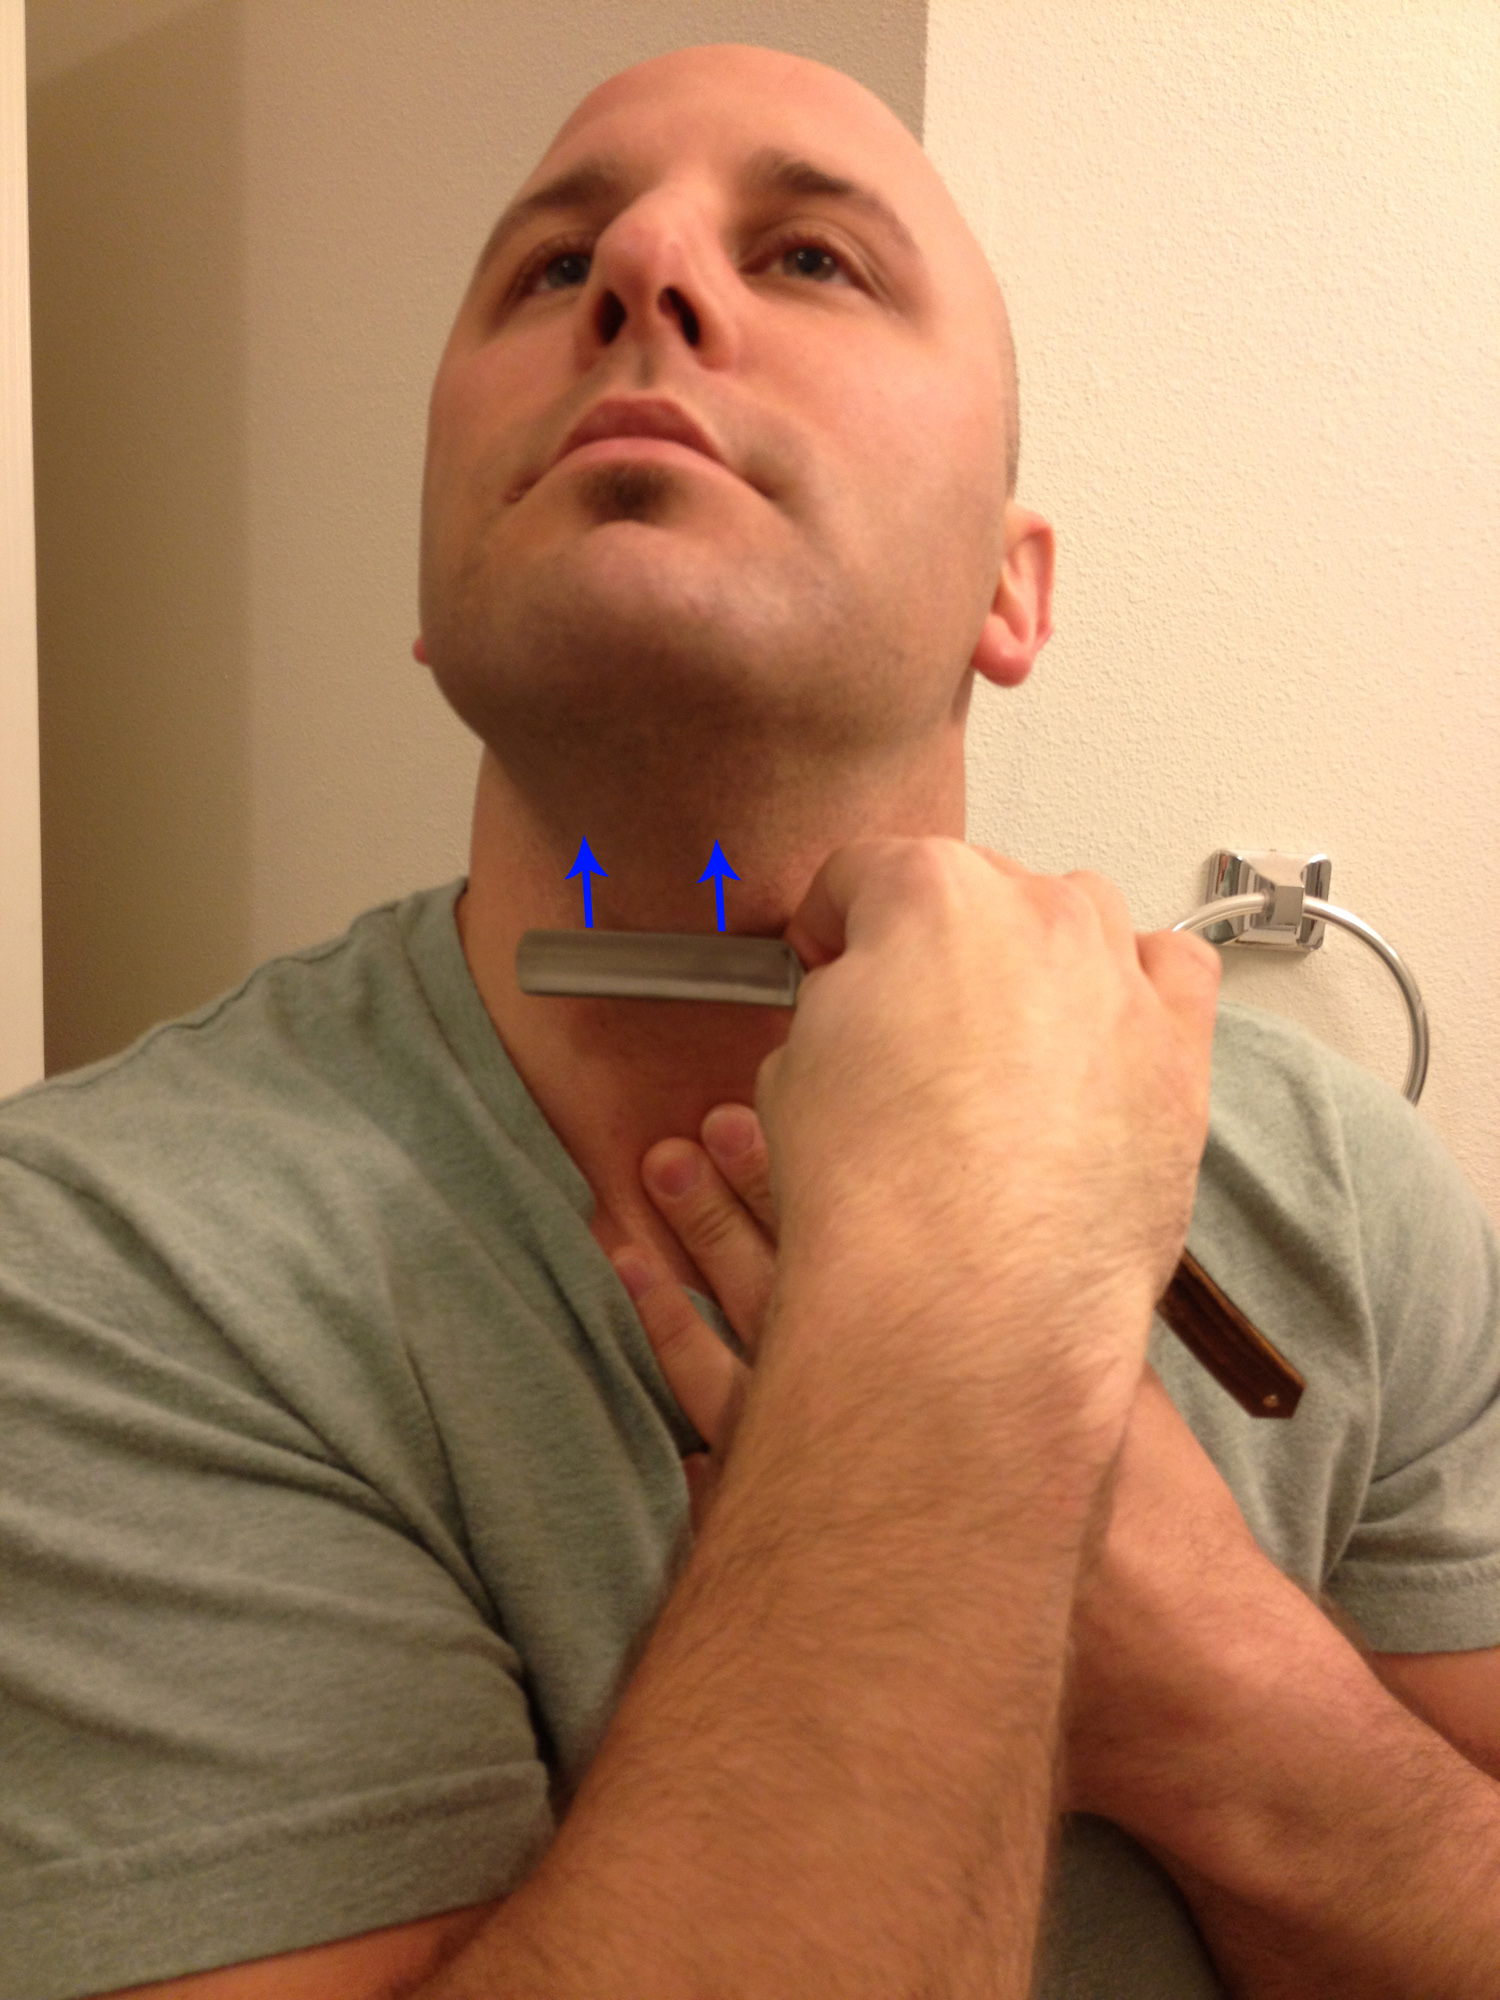
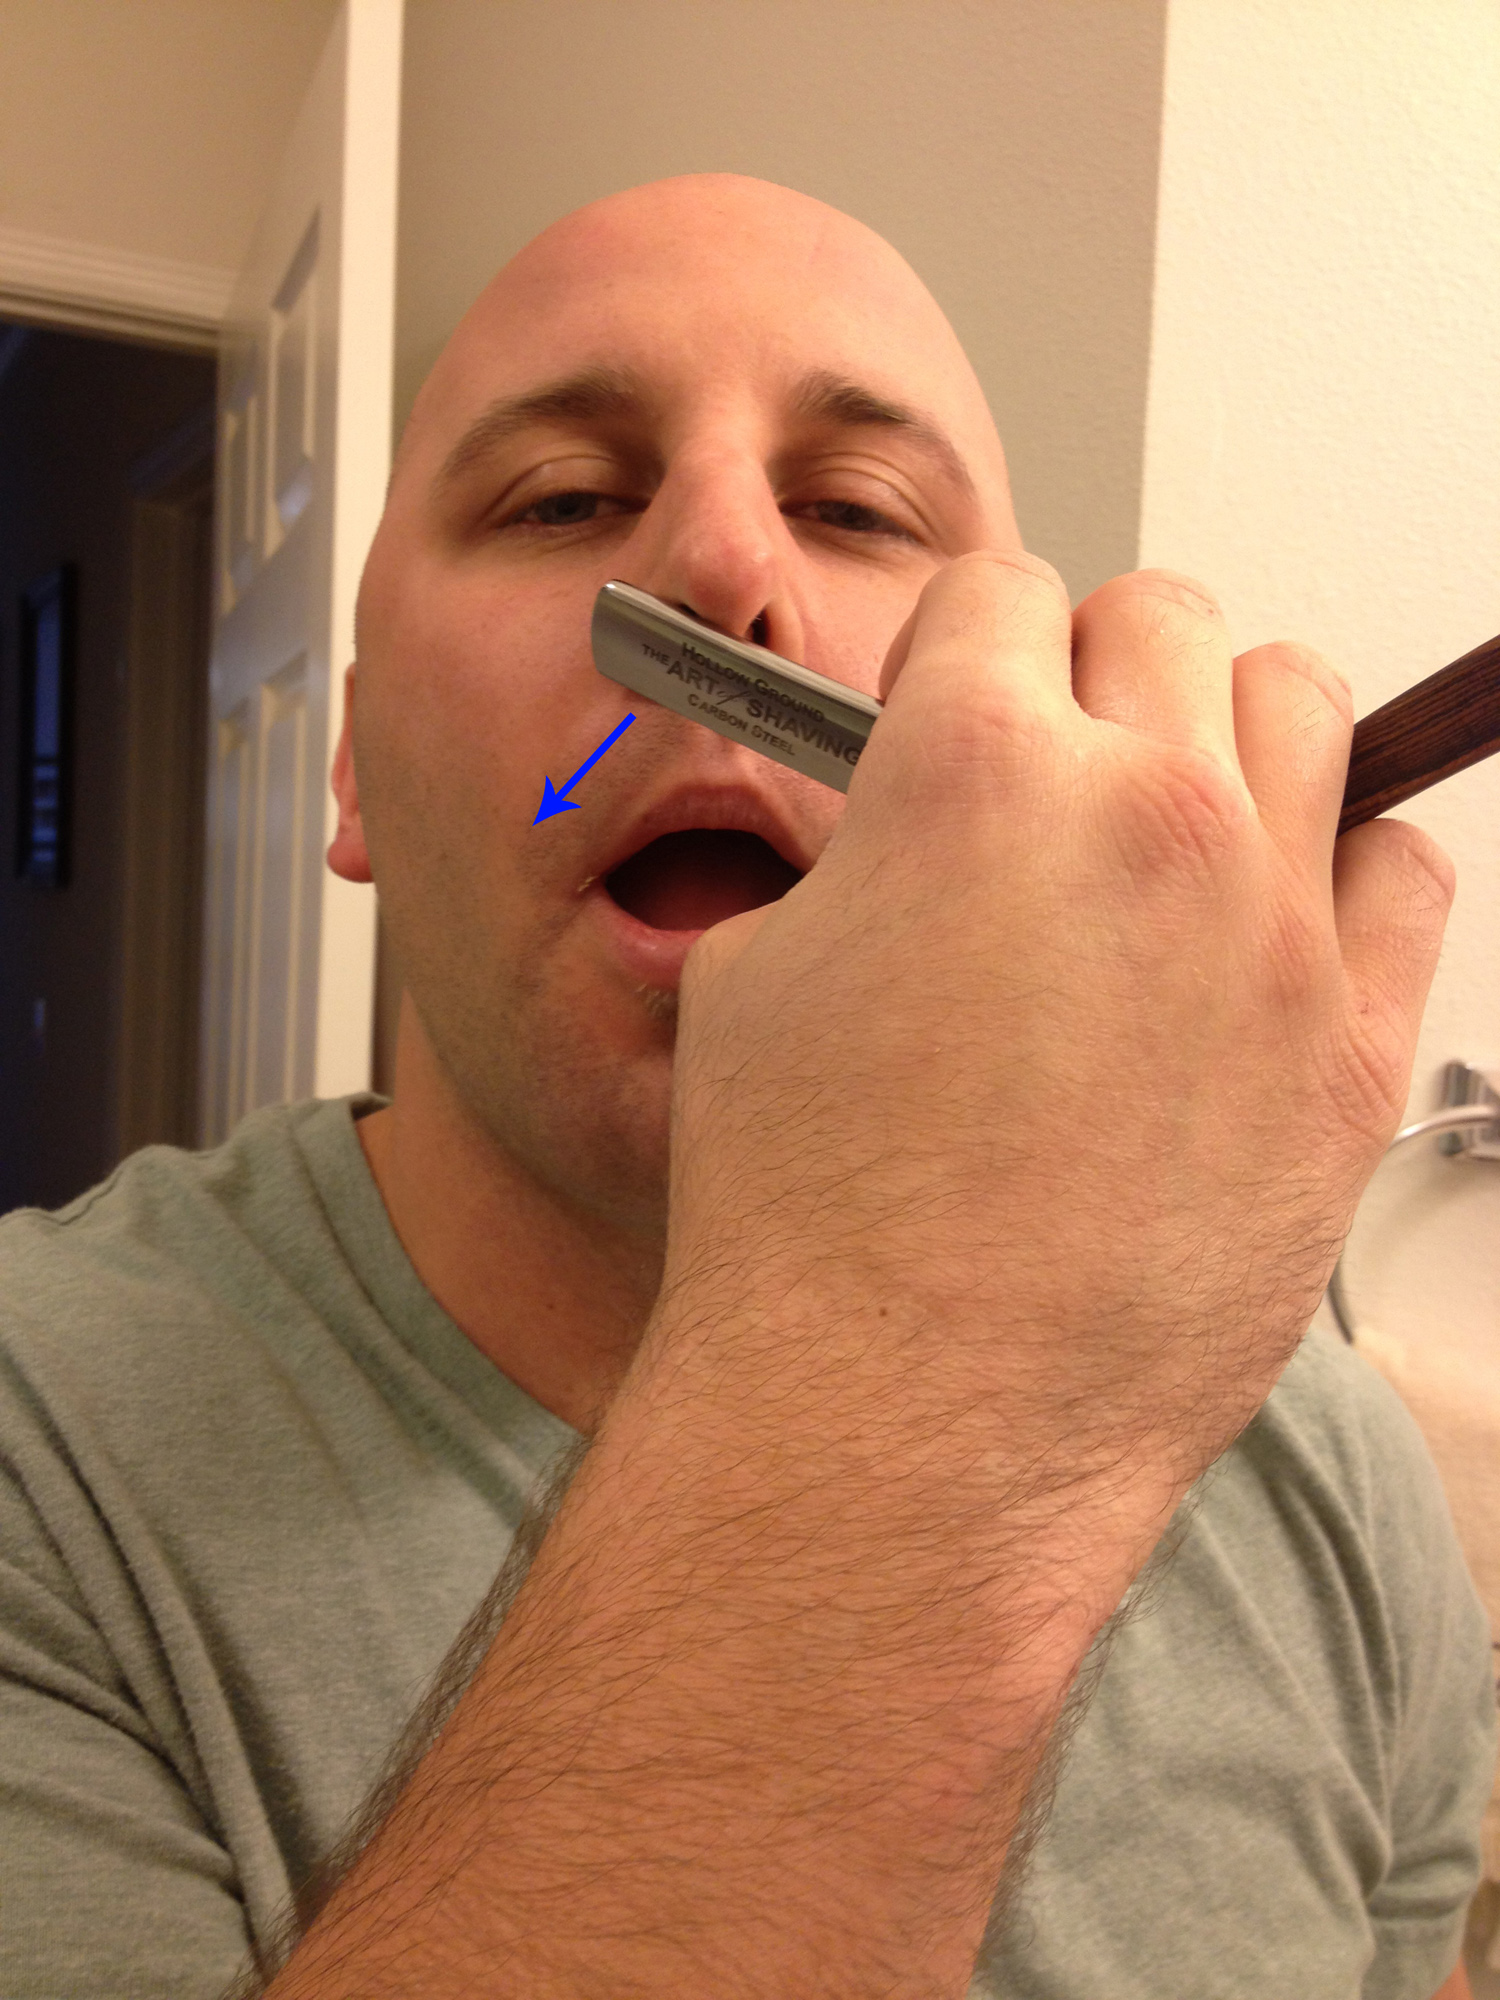
Even though I am placing Safety Razors on a pedestal, there are indeed still some cons.  There is an initial investment, a decent new Safety can cost anywhere from $30-$80, but the fact that it will last forever should override that as a con, buy one and never need another. There is a learning curve when using one, because there is no pivot to the head of the razor, you need to take your time at first and insure you have a proper angle during shaving. Many people are hesitant to switch to a Safety because of this learning curve and feel it may be difficult, truth is they are over-thinking it. After a few shaves (a month at most), you will have perfected the technique and will breeze through your routine without blinking.  The last con I can think of is nicking yourself.  Blades are sharper and some have blunt corners, so you may nick yourself during the learning process, but your technique will come naturally and this downfall will end relatively soon.

- BREAKING DOWN THE COST
Prices based on shaving once each day for a year. Prices from CVS website and Amazon

Cartridge Razor (Mach3)

  • Initial Investment: Handle = $10 – 12pk cartridges = $30
  • Lifespan: 1 week/cart. , or 7 Shaves/cart. , or84 shaves/pk.
  • 2.8 months per pk.
  • Total upfront cost = $40
  • Total cost in 1st year = $130
  • Annual cost thereafter = approx $124

Safety Razor

  • Initial Investment: Handle = $30 – 100pk double-edge Astra blades = $10
  • 200 shaves (on a double-edge razor, each side used once)
  • 6.7 months per pk.
  • Total Upfront cost = $40
  • Total cost in 1st year = $58
  • Annual cost thereafter =  approx. $15

Shaving Brushes: Different types

Shaving brushes have several benefits. They infuse your shaving soap/cream with water, this helps to create a lather that is richer than one you could create by lathering with your hand. It will also gently exfoliate your skin, removing any dead skin cells, to keep the skin healthy and soft. Finally, a shaving brush will help to properly lift and soften the stubble to help you achieve the closest shave possible.

PURE BADGER (also Black Badger)

This is the most common type of brush since it uses hair from the underbelly of the Badger, this is the hair that covers most of it’s body. Because of this, Pure Badger brushes vary greatly and can range in color from dark tan to black. They are generally the least expensive and easiest to find.  They usually have a coarse texture that feels scratchy but will soften a bit over time. Some feel its scratchiness can be beneficial in exfoliating the skin and helping to lift the beard, it also helps to agitate the top of soaps to build better lather. Black Badger is another type of Pure Badger, they are made using only the darkest hairs and have a more overall stiffness throughout the brush.  After being placed in the brush handle, Pure, as well as Black Badger, generally have the hairs cut to form the shape of the loft.

BEST BADGER

These brushes are lighter in color than the Pure Badger, ranging from lighter tan to gray and the hairs get lighter as they reach the tip of the loft.  They are more densely filled and are usually fit so the tips do not need to be cut.  Because of this, they are less scratchy than the Pure, but some “wet shavers” will debate whether there is much of a significant difference between the two.

SUPER BADGER

These are made of hairs found on the back of the animal and are known for its black “band” through the middle and lightens at tips to almost white.  Some manufacturers have been known to bleach the tips of a Super Badger to further enhance the lightness. These white tips are short but never trimmed, and because the hairs used are finer, it takes more of them to fill the brush. They are delicate, so they are more prone to damage if not used/dried properly.  Super Badgers are dense and soft, with little to no scratchiness and have a more luxurious feel than the Pure and Best Badgers.  They easily build lather and hold in water better than the lower grades, but are also significantly more expensive as well.

SILVERTIP BADGER

This is the highest grade badger brush and the most expensive because they use a more rare hair found on the neck of the badger. Like the Super, these have a distinct color “band” from black to white, but the tips are never bleached from their natural white color. These hairs are the most delicate and require the most care to avoid damage and prevent the hairs from breaking. They are similar to the Super Badger, yet slightly better, in their ability to absorb water and build fast/amazing lather. They do have a significantly softer and more gentle feel on the face, making the Silvertip the most luxurious of all brush grades.

Note: Although a quality brush is made of badger, Boar bristle brushes are also not uncommon because they are extremely inexpensive.  They are extremely scratchy and prickly and do not hold water well. They cannot build lather nearly as well as ANY of the badger brushes.

Shave Prep. Ready Your Face!

– CLEAN IT! WASH YOUR FACE!
Begin your prep by cleaning your face, warm water and your normal cleanser is fine, you could also use a small amount of your shaving soap instead. This part is crucial because dirt and oils on the skin could aid in acne and even post-shave irritation. This step is also the first step toward lifting and softening your stubble to make for an easier, more comfortable shave. Many of us like to shave right after our shower, this insures the face is clean as well as softens the skin and stubble from shower’s hot water and steam.

– PREP IT! APPLY A PRE SHAVE CREAM
The prep before your shave is just as important as the shave itself. are not a necessity, When massaged into the beard, the pre shave cream penetrates the skin it becomes better moisturized and very supple, making the skin more pliable.  Pliability will reduce cuts and irritation because your skin will “give” to the blade and conform to the blades contours, eliminating the “drag” that may happen on dry,  less supple skin.

– WARM IT UP! ADD SOME HEAT TO THE FACE!
Take a lesson out of your Barbers book and apply a hot towel.  You may not have a luxurious towel steamer like your Barber, but you don’t need one, a simple face cloth that has been soaked in hot water and wrung out will work perfectly.  Press it to the face and hold it for a minute or so (or until the cloth feels like it’s becoming luke warm), this will warm the previously applied oil and help soften the stubble from it’s shaft.

– LATHER IT! DON'T FORGET YOUR SHAVING BRUSH!
Your lather is something that could make or break your shave. A bad soap/cream could render all of your previous prep worthless, so a good quality product is essential (read through the shaving forums that are out there, they are helpful in deciding what is good and bad).  USE A SHAVING BRUSH! They hold in necessary moisture and lathering with one will properly lift the beard in preparation for the blade.  More info on how and why shaving brushes work can be found in our blog post about Badger Brushes (click here).

– SHAVE IT! THROW AWAY THAT CARTRIDGE RAZOR!
A new/clean blade will keep your shave comfortable and prevent dreaded post shave irritation. Shave with a “proper” razor, Safety Razor (Double-Edge Razor) or Straight Razor shaving will give you a shave that is far superior to that of a Cartridge Razor.  Want an explanation why? Click Here and read!  If you are prone to razor bumps and ingrown hairs, shaving with the grain is a surefire way to prevent them, study your beard and feel for the direction of growth and shave WITH it. Use light pressure and let your razor do the work, and don’t forget to take your time.

– CLOSE EM UP... YOUR PORES
After a close shave, your face is very vulnerable, the pores are wide open and susceptible to clogging if not properly closed.  Rinse with COLD water, it may be shocking at first but fight through it and don’t be a baby! You cold also soak that face cloth in cold water and apply it the same way you did the hot one.  Be gentle and pat-dry your face, wiping aggressively may irritate areas like under your neck.

– FINISH IT OFF! FEEL THE BURN!
A splash of your favorite aftershave will help seal up those pores and have you smelling fresh. If you have dry skin, opt out of the aftershave splash and use an aftershave balm instead, this with help replenish moisture and refresh your skin.

History of the Barber Pole

The barber pole is something we see in front of every barbershop, actually, it is required by law that barbershops in Massachusetts display a barber pole at their storefront.  It is often forgotten that the Barbers of the past were not just there to cut hair and shave beards, they also performed minor surgeries, dentistry, and tasks such as bloodletting.  Each day, customers walk into my shop and as what the significance and symbolism of our pole is, so I thought I would share it with you all.

The original barber’s pole has a brass ball at its top, representing the vessel in which leeches (for bloodletting) were kept and/or the basin which received the patient’s blood. The pole itself represents the rod which the patient held tightly during the bloodletting procedure to show the barber where the veins were located. The red and white stripes represents the bloodied and clean bandages used during the procedure. Afterwards, these bandages were washed and hung to dry on the rod outside the shop. The wind would twist the bandages together, forming the familiar spiral pattern we see on the barber poles of today.

After the establishment of the Barber-Surgeons Company in 1540, a statute was passed that required barbers and surgeons to distinguish their services by the colours of their pole. From that point forward, barbers used blue and white poles, while surgeons used red and white poles.

Today, red, white and blue barber poles are often found in the United States. Some interpretations say that the red represents arterial blood, the blue represents venous blood and the white represents the bandages. Spinning barber poles are meant to move in a direction that makes the red (arterial blood) appear as if it were flowing downwards, as it does in the body.

Facts like this are often forgotten in the barbering industry. You may be surprised to find out that your own barber may not know the meaning of the one piece of his business that represents his art.

How to build lather with a brush and mug

Here is an example of great lather!

Here is an example of great lather!

HOW TO BUILD LATHER WITH YOUR BRUSH AND MUG

1.  Fill your mug with hot water and place your shaving brush in it to soak. Set this aside for a few minutes (some wet shavers will take their shower and let the brush soak through the duration). Not only will this hydrate your brush, but it will also heat the mug to help to keep your lather warm during your shave.

2.  Pour out the water from the mug and give your brush a LIGHT squeeze or a few shakes to remove some excess water. Do not squeeze out the water completely otherwise your lather will become too dry as you mix it.

3.  Add some cream to your bowl (about the size of a nickel) and begin mixing it with your brush. After 20-30 laps, you should notice the cream swirl around the sides of the mug and look more like a paste rather than begin to foam. If so, add a small amount of water to the mug (about a teaspoon) and continue mixing. This technique of adding water as you go is called the Load/Hydrate Method. Note: It is important to start with little water and add more as you go to ensure the cream will not become too wet. Wet lather will be runny and lack the protection your cream should provide.

4.  After adding more water, your cream should begin to foam, if it still looks to dry after another 20-30 laps, add another round of water and continue mixing. Repeat this step as needed until your lather looks thick.

HOW TO KNOW WHEN YOUR LATHER IS JUST RIGHT

Use the Load/Hydrate Method until the right consistency is met. Once the correct cream to water ratio has been achieved, the lather will appear rich and creamy in texture with little to no visible air bubbles.  This may look more like the thick foam from canned shaving creams but will perform much better.  Properly hydrated lather loads into the brush easily and spreads across the face smoothly and evenly. Lather that is too dry will begin to flake on the face as the shave progresses, lather that is too wet will look bubbly and be runny on the face. Both of these lack the smooth quality and protection needed and will lead to an uncomfortable shave and irritated face.  A good lather should maintain its consistency in the loft of the brush and provide consistent protection when reapplied between passes.

How to ask for your haircut

It is not uncommon that a customer sits in the Barber’s chair and has no idea how to ask for the haircut they want or style they envision.  It is not your job to know “barber terminology” and any good Barber should ask plenty of questions before they are comfortable moving forward with your cut. Don’t be overwhelmed or feel rushed, use these helpful tips to ensure the Barber can achieve the style you desire.

BRING A PHOTO – Check the pics on your phone, if you have an image or selfie from a time when your hair was looking fresh, bring it in! Don’t feel embarrassed, a visual reference is always best.

HOW LONG HAS IT BEEN? – When was the last time you had a haircut and did you like it? If you didn’t, tell the Barber what the issue was, maybe it was cut too short or not short enough.  This is helpful in knowing how much to take off and how the finished product “should” look.  If your hair is three inches long and you had your last haircut one month ago, the Barber would know that you are not in for a buzzcut (unless drastic change is your goal).  The model I go by is that hair grows 1/2 inch per month on average.  This is not the same for everyone so the Barber should err on the side of caution.

START WITH THE SIDES & BACK – Did your previous Barber use the scissors or clippers on the back and sides of your head? If he used the clippers, do you know what attachment/number was used? If not, ask the Barber to start with the longest to let you see the length and move down a number at a time until you reach the proper length.  Maybe you prefer the sides and back cut with scissors, do you like the sides cut ABOVE the ears (no hair touching the top of the ear and and has nice clean edging around the ear)? If you would rather the sides to sit ON or OVER the ear, how far down? Should it touch the top of the ear, fall to the middle of the ear, or to the bottom of the earlobe?

YOUR NECKLINE – Many people only see the back of their head when the Barber shows it to them, and majority just nod in approval because they are unsure what they are actually looking at.  Here are your options:

  • Square – Straight line at the bottom with square or “sharp” corners.
  • Rounded – Straight at the bottom with the corners rounded off instead of “sharp.”
  • Tapered – Also known as “faded.” No visible line at the bottom and gradually tapers/fades into the hairs length.
  • No Preference – Trust the Barber to finish the neckline as he/she sees fit for your hair style.

MOVE TO THE TOP – Once you have approved of the length on the sides and back, then and only then should you move on to the top of the head.  Use the “1/2 inch a month method” and start with that and take the same approach as you did with the sides, trim a little at a time and check it.  Eventually you will reach the desired length and BOOM you got your look.

LOG IT – Give the Barber your phone to snap pics of your dome from the side, back, and front.  Not photogenic? Ask the Barber the to write the final lengths and any other helpful details on the back of one of his business cards.  Bring the pics or the card to use as a reference the next time you visit the shop.  It will also help to ask for the same Barber each time so you can help build consistency, don’t worry, the other Barbers are not offended if you tell them you prefer to wait for someone else.

That’s it!